Records Management in SharePoint 2010 enables you to
manage business documents that are necessary for regulatory compliance,
business continuity, or historical interest. Records management is not
new to SharePoint 2010, but it has been enhanced to allow both in-place
records management in addition to the ability to move documents to a
specific records center (leaving a permanent link to the new physical
location in its place). In a nutshell, records management involves
declaring a record, setting polices, and auditing around documents. It’s
an effective way to ensure that historical content is maintained, not
deleted, and does not burden search engines and content navigation.
1. Record Declaration
To start off, which will you use: in-place records
declaration or the records archive? You’ll likely use both and will need
to decide which and when. There are certain items you need to consider:
Record retention rules
Which users can view records
Ease of locating records (collaborative users versus Records Manager)
Maintaining each version as a record—do you need this?
Records Auditing—how often will you audit records?
Site organization (and number of sites used)—what does your IA look like?
E-discovery
Security
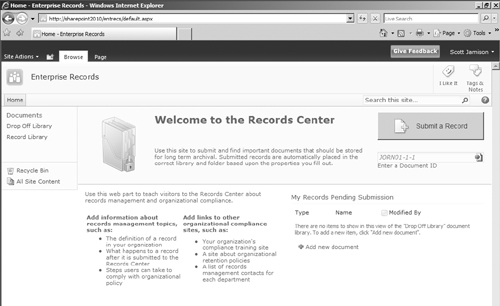
If you plan to use a records archive, you will need
someone in a records manager role to ensure that records are managed
well and that rules are followed. Your records manager will need to work
closely with your general counsel, compliance officers, and information
architect to ensure protected content is properly identified. For some
content, they will likely set up a records archive using the Records
Center template (Figure 1). Other content could be managed using in-place records management as described in the next section.
You can also declare records in-place. This requires
you to enable a Site Collection-level feature called In-place Records
Management (see Figure 2).
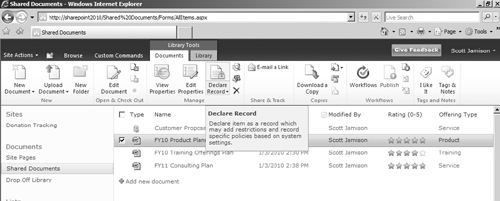
Once you enable in-place records management, you can then enable manual
declaration of records either at the Site Collection level or at the
document library level (under Record declaration settings). You can also
automatically declare items as records when they are added to certain
lists or libraries. After you enable manual declaration of records,
users will see a new action in the ribbon that allows them to declare
items as records (see Figure 3).

2. Auditing
For
many organizations, especially those in industries that require a high
level of regulatory compliance, storing documents in a repository is not
enough. It is just as important to manage the activity around those
documents. Activity management is all about auditing or recording the
details around what happened to a particular document across its life
cycle. Examples of audit information include things such as: Who added
particular sections and when? When was this document approved and by
whom? What did this document look like on a certain date? What are the
rules around document retention?
An even more granular audit requirement is the
ability to record viewing statistics associated with a particular
document. Let’s say you have a new corporate policy that requires
executive approval prior to publishing. The information in the document
is so sensitive that you may want to know who viewed this document prior
to its approved state. As you can see, auditing spills over into
accountability. Because of this, it is important to have a robust
records management solution in place to properly track and record all
details associated with portal content.
SharePoint 2010 delivers on the goal of effective
records management by providing a system that allows auditing on
documents or any list item. SharePoint 2010 provides auditing
capabilities for tracking specific events like when a document was
opened or viewed, when a document was edited, when a document was
checked out, and even when a document was moved to a new location. All
of this is built right into the SharePoint 2010 system interface and is
easily configured as part of a list or library definition.
In addition to item-level auditing, SharePoint 2010
also provides auditing at a specific site level. This is an especially
interesting feature as it allows site managers to track when security
changes were made within the site and when metadata associated with a
particular document were altered. Think about the impact of such a
feature! Administrators can be assured that policies about site security
and/or document definition can be effectively monitored and enforced.
This is how the term compliance gets introduced in the SharePoint 2010 feature set.
Only administrators can see details on audit data.
Content contributors, whose activities are be tracked, do not have
access to audit reports. In addition, no one is allowed to edit or alter
audit data. This lockdown ensures that audit trails are always complete
and accurate. In
addition, audit policies themselves can be audited so administrators
can assess how well certain policies are being followed. This
rules-based approach is yet another reason why SharePoint can support
restricted and sensitive information. Everything is monitored; polices
are always tracked.
3. Information Management Policies
We’ve briefly talked about applying audit policies to
specific document or list items in SharePoint 2010. One of the obvious
questions is, how do you ensure that these policies are in place, in all
the right places? SharePoint 2010 provides the ability to set
Information Management Policies as a means for administrators (or
records managers) to define the proper audit policies as well as apply
them to all relevant locations so no one has to worry about these
policies extending into new sites or documents.
As with most SharePoint 2010 functionality,
Information Management Policies management is built right into the
interface. This allows administrators or records managers to define
policies directly in the Site Settings of a particular document or site.
In the Permissions and Policies section, there is a link for
Information management policy settings. This is where policy is defined
and applied.
Setting and administration of Information Management
Policies is intended to be simple and intuitive. No special skills are
required to define policies. For end users, the experience is just as
simple. When a policy is in place around a particular document, the user
is made aware by a notification bar at the top of the document. All
other functionality is the same as if there were not an Information
Management Policy in place.
While there are several Information Management Policy
use cases, let’s look at a specific example associated with an
expiration policy. Very much like metadata capture, document expiration
is critical to the overall effectiveness of portal document delivery.
Few documents should live forever (at least in the context of the
corporate portal). Over time, most documents become less relevant and
therefore should be either reviewed and revised or moved out of the
mainstream. Without rules and policies in place, this becomes an
overwhelming burden for document administrators. Who can be responsible
for investigating all documents for usefulness?
SharePoint
2010 introduces the ability to have multistage expiration policies,
which is a set of rules for executing activity on a particular document
or group of documents. This is a two-step process.
The first step is to define when
a document will encounter an expiration trigger. This is most easily
done with logic against known metadata (another reason to properly tag
content!). While most rules will be date driven (for example, expire
after 180 days), any metadata can be used to drive expiration, including
a Records Retention Code.
The second step in the policy definition is to define what happens
to the document when the criteria are met. This can take many forms;
you can delete the document from the repository or perhaps launch a
SharePoint-based workflow that can move that document to an archive
location. By setting expiration rules, administrators and records
managers can ensure that the portal always contains relevant and timely
data. See Figure 4 for the compliance details on an item; note that the item has a multistage retention policy.